Adding New Layers
Basics for adding a new layer
- Open the
data.jsfile in any text other.

- You should see the line
/* ********** Data Layers ********** */, it is the category of the layer. There are many categories in the file as mentioned below:- Data Layers
- Vision Layers
- Recurrent Layers
- Activation/Neuron Layers
- Normalization Layers
- Noise Layers
- Common Layers
- Loss Layers
- Utility Layers
- Python Layers
- You should add the new layer below the category it belongs to.
- Moving to the next line in the image, we create a new json element (layer). The line
// Only Caffetells that this layer is only for caffe and not for keras. - Add the suitable comment for the new layer or leave it if there is no such need.
Detailed overview of a layer
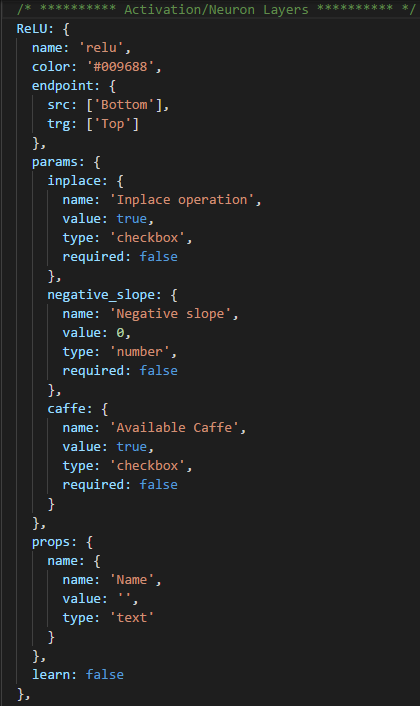
- Here is a whole layer shown named
ReLU. It is aActivation/Neuron Layer, that’s why it is kept below the line/* ********** Activation/Neron Layers ********** */. - Then add the suitable comment for you layer or leave it empty if it is not for any specific framework.
- Keywords’ explanation:
- name: Name of the layer.
- color: Color of the layer to be shown in frontend.
- endpoint: Endpoints of the layer.
- src: Source endpoint of the layer.
- trg: Target endpoint of the layer.
- params: Parameters for the layer.
- inplace: Checkbox input for the layer.
- negative_slope: Numerical input for the layer.
- caffe: Availibility of caffe (Checkbox input).
- props: It defines the properties of the layer.
- learn: This declares if the layer can be used for learning.
- We can define different parameters for a layer and it is not limited to
inplace&negative_slope.
Making the layer visible in Fabrik
- Open pane.js in a text editor, and you should see something like this.
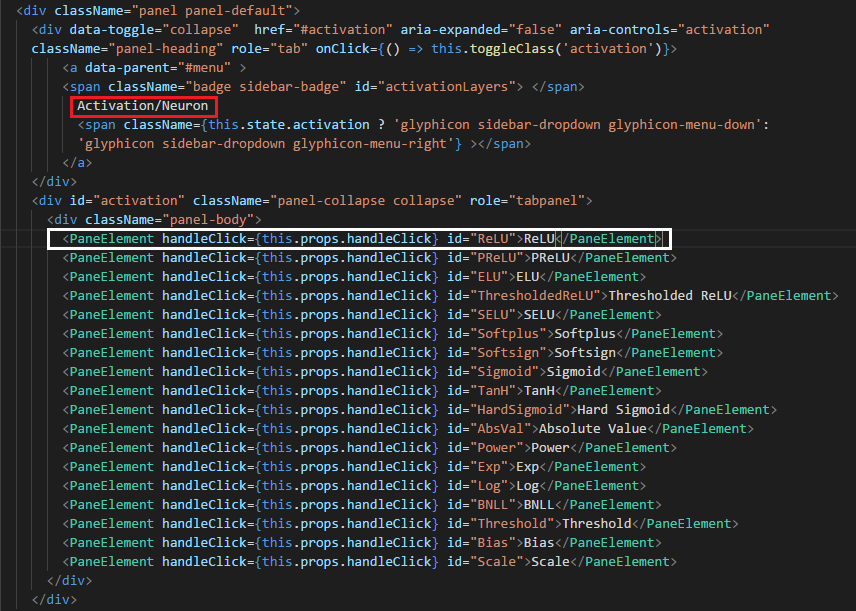
- Now, add a new line for the layer you just added in
data.jsin the section of Activation/Neuron Layer, because this layer belongs to this category. <PaneElement handleClick={this.props.handleClick} id="your_layer_id">your_layer_name</PaneElement>this line will make your layer visible in Fabrik.
Adding layer handling to the backend
- Open import_prototxt.py file in a text editor.
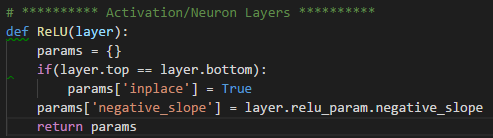
- Add a function for the new layer below the category of this layer.
- Load the parameters, do the calculations for your layer in pyhton and return the value of
params(parameters). - Move down in the file.
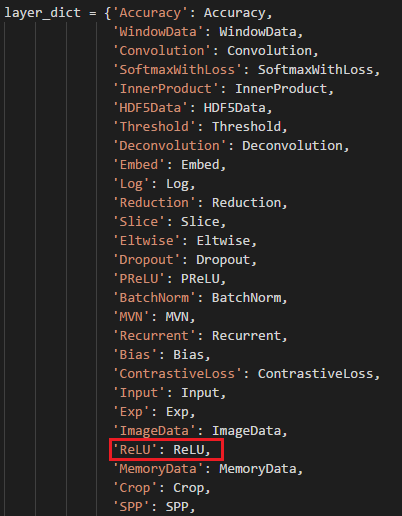
- Add your defined layer in the
layer_dictarray, as shown above. - Now, open jsonToPrototxt.py in a text editor.
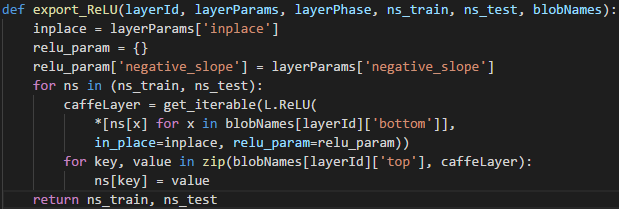
- Add an export function for training and testing of the new layer.
- There you need to load parameters, then train & test values and at last return the trained and tested data.
- Move down in this file as well.
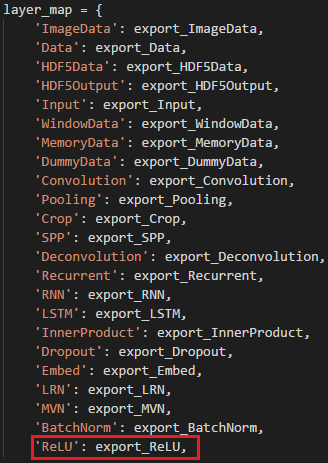
- Add the export function in the
layer_maparray.
Testing and pushing the new layer.
- Run the fabrik application on you local machine by following the instructions in README file.

- Check the new layer inside the category you added it. See if all the parameters are properly displayed and usable as you wanted.
- If everything is working fine commit your changes and push it to your fork then make a Pull Request.
- Congratulations! Happy contributing :-)